
This Cozy Greenhouse Tucked into the Redwoods Is Designed to Nourish Plants and the Soul
How a professional farmer paints with plants in the heart of the Redwoods.

Thomas J. Story
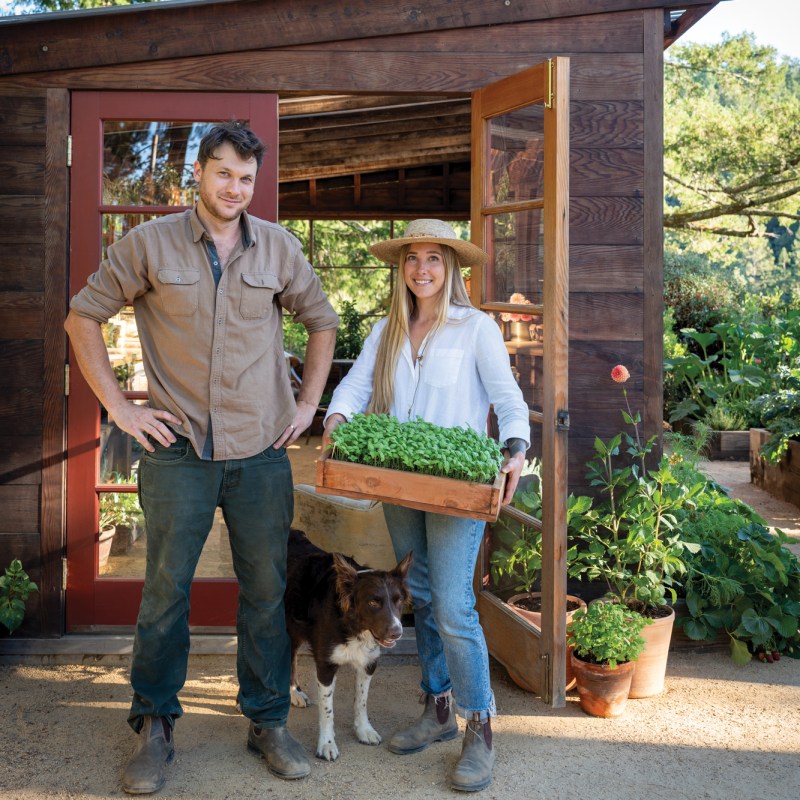
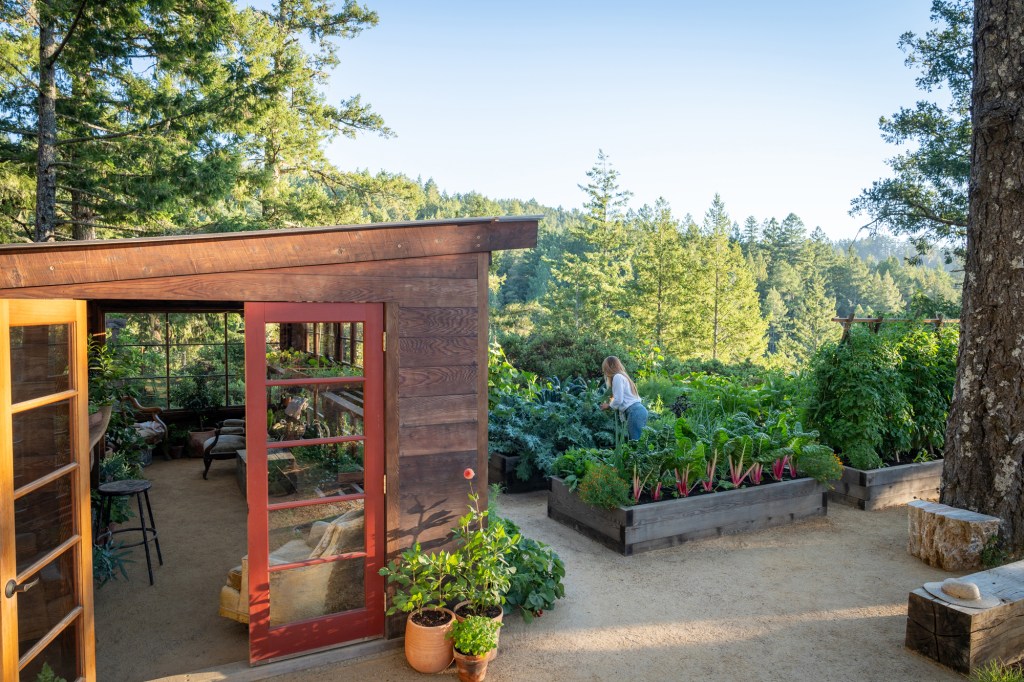
Christiana Drewry has always been surrounded by the beauty and abundance of the land. Raised in Northern California’s Capay Valley, she spent years working on farms across the globe and growing for Michelin-starred restaurants, discovering her true passion along the way: creating edible landscapes that blend the practicality of agriculture with the artistry of homestead design. Today, she brings this vision to life from her home garden and greenhouse nestled in Marin County’s scenic San Geronimo Valley.
Thomas J. Story
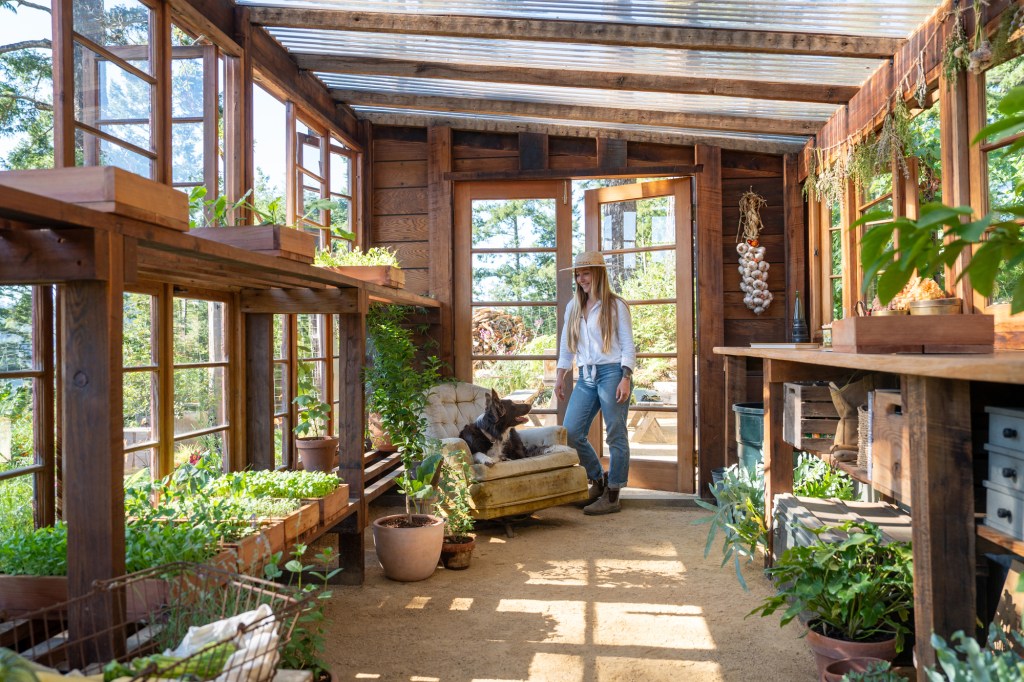
Through her work with The Backyard Farm Co., Christiana is now shifting her focus from planting and maintaining farms to educating others on how to grow their own food at home. With a comprehensive online gardening course, she empowers gardeners of all levels to design productive, sustainable backyard farms. “The best part has been fostering a community of backyard farmers from all over the country,” she says. Her approach is rooted in simplicity, creativity, and sustainability.
For Christiana, gardening isn’t just about feeding our bodies; it’s about nurturing experiences that nourish our souls. It’s a powerful way to reconnect—with the land, with the community, and with the simple joys of life. “Sharing food with loved ones is deeply rewarding,” she adds, and encourages others to cultivate their own bountiful, sustainable foodscapes—whether in small urban plots or sprawling backyard gardens. Now, she’s sharing her top tips with us for creating a garden that’s as pretty as it is productive, no matter your space or skill set.
Start with Soil
Thomas J. Story
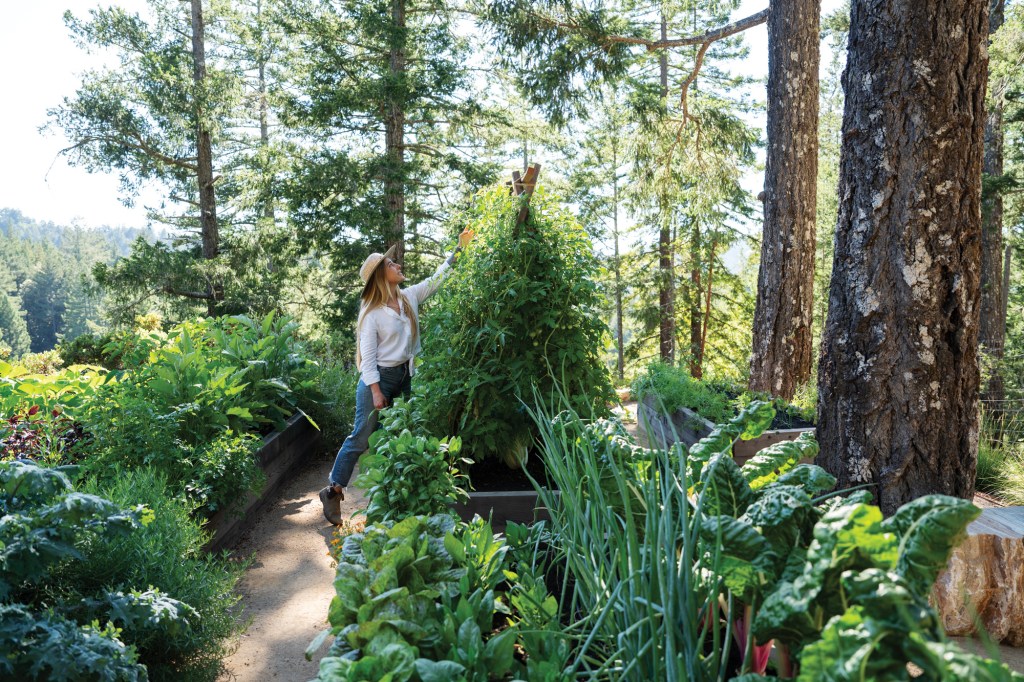
When Christiana looks at a backyard garden, she sees a chance to marry the beauty of homestead life with the efficiency of professional agriculture. “On a large farm, you often can’t afford to spend time monitoring each individual plant, while in the garden, it’s the opposite—you can’t afford not to,” she says. Her approach borrows structure from the field—deep soil, defined paths, and drip irrigation—and blends it with the intentionality of design. Think symmetry, layered planting, and materials that complement the home. The result? A space that feels both hardworking and high-style.
Thomas J. Story
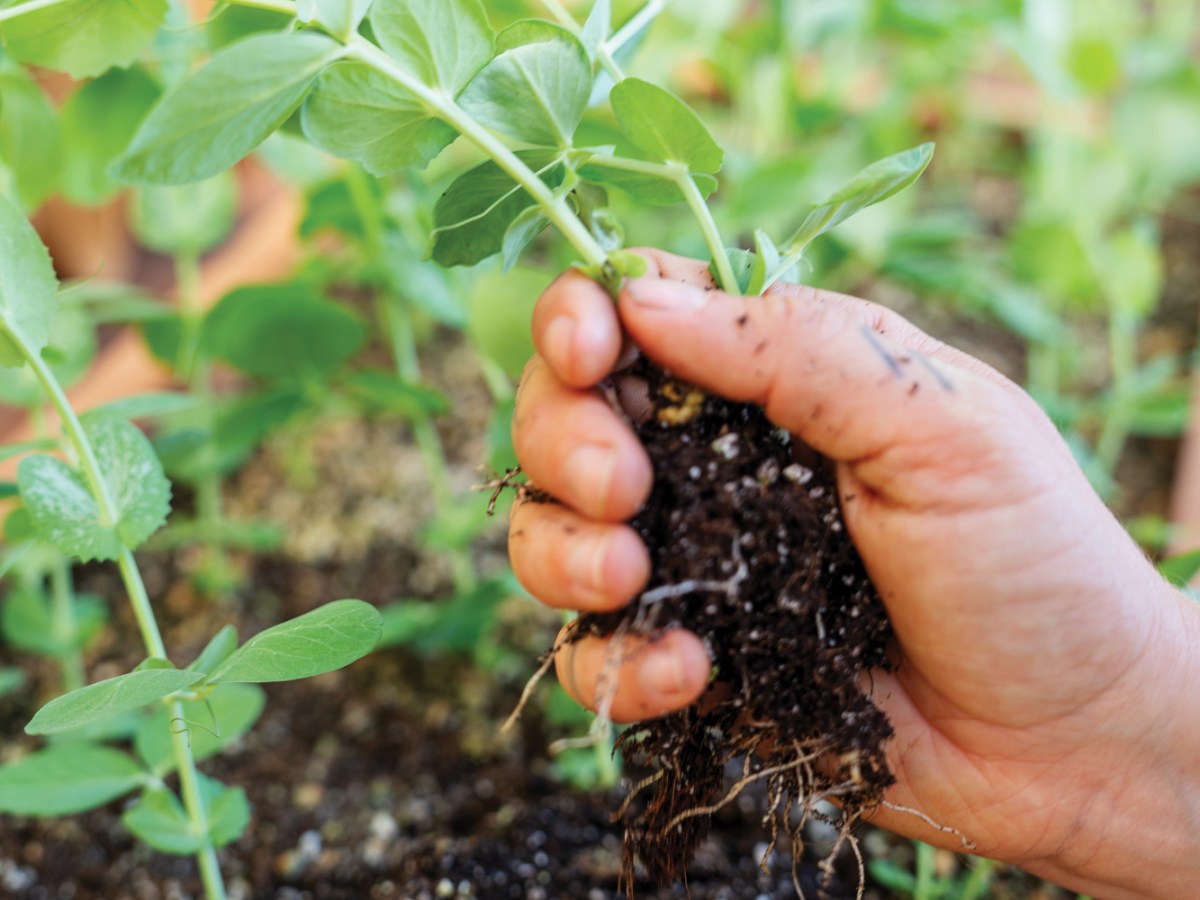
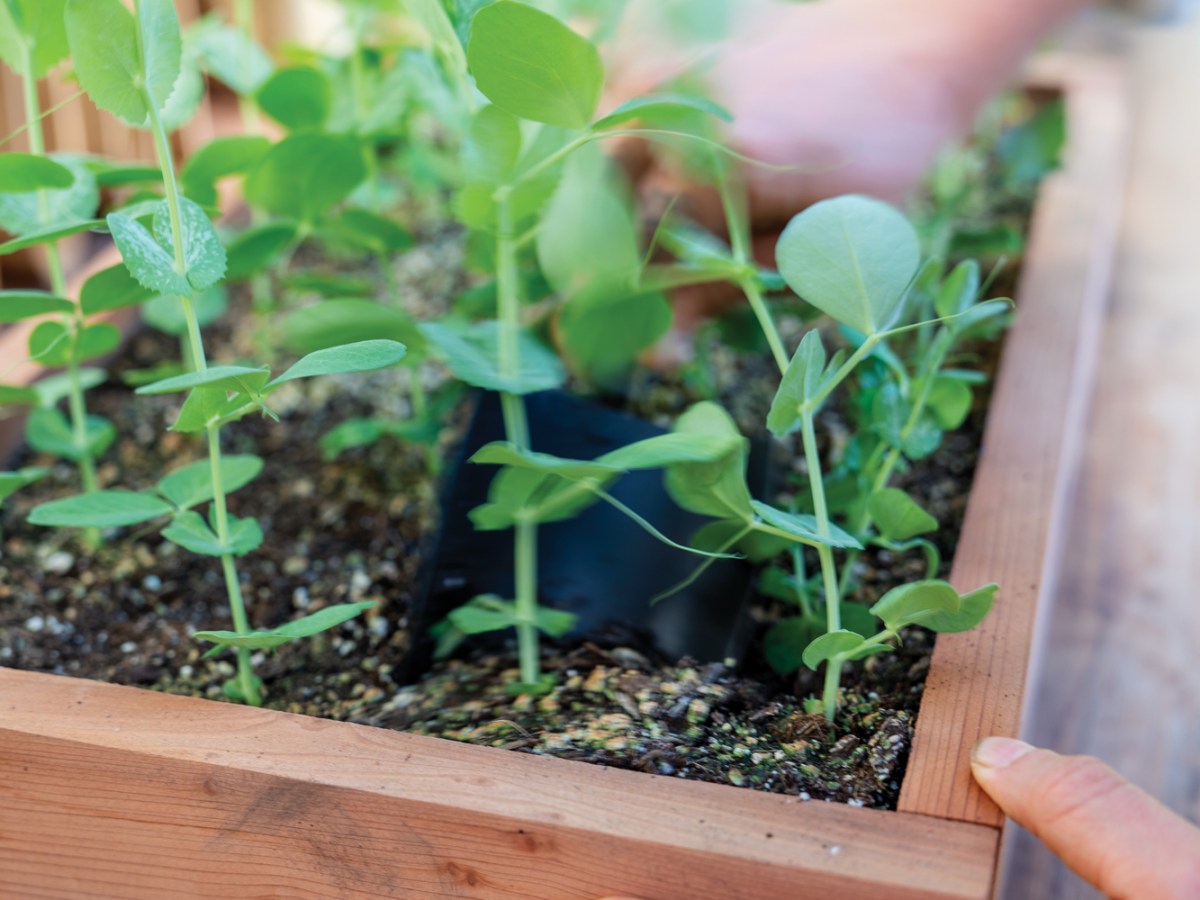
One of her biggest takeaways from life on the farm: Become a soil farmer first. “Healthy soil is alive,” she explains, urging gardeners to think beyond texture and dig into microbial life, oxygen flow, and drainage. She recommends starting with a base of native soil, compost, and something for aeration—like lava rock or coconut coir—and testing it with a lab to see exactly what your plants need. Organic practices, proactive pest prevention (like neem oil and regular egg checks), and nutrient-rich amendments each season help maintain balance below the surface.
To keep the garden productive and polished, Christiana uses every inch wisely. Raised beds make sense for both form and function—protecting roots, improving soil conditions, and offering a clean visual frame for your crops. “Choose a material or color that matches the house,” she suggests, to integrate the beds into the landscape. For small spaces, vertical gardening is her secret weapon: Climbing tomatoes, beans, and cukes on trellises or tunnels not only maximize yields but also add architectural drama. “Vertical space is untapped garden real estate,” she says. It’s that kind of thinking—farm-smart, design-savvy—that turns a humble plot into a true backyard masterpiece.
Prioritize Productivity

Thomas J. Story
Creating a garden that’s both abundant and manageable is all about prioritizing purpose. “Don’t try to grow it all,” says Christiana. Instead, focus on your favorite foods—those you’d like to stop buying from the store. For Christiana, that’s kale, chard, and herbs. By allocating garden space to these crops, she ensures a steady, daily harvest. She encourages gardeners to think about their grocery shopping habits and replace items they regularly buy with homegrown alternatives. Whether it’s baby salad greens, spinach for smoothies, or a berry patch for the kids, growing what you already purchase is the key to a productive garden that truly serves your lifestyle.
For those looking to create a highly productive garden, Christiana stresses the importance of understanding crop lifecycles and harvest windows. Some plants offer a single harvest, like root vegetables, while others, like cucumbers, tomatoes, and kale, provide multiple harvests over time. “Focus on mixing these plant characteristics to ensure there’s always something ready to harvest, while you wait for the long-haul crops,” she advises. Succession planting, or planting crops in stages a few weeks apart, is another critical strategy for maintaining a consistent harvest throughout the season to achieve a continuous supply of fresh food.
Thomas J. Story
To simplify garden selections, Christiana recommends focusing on flavor and time commitment. Homegrown produce can vastly outperform storebought, especially when it comes to taste—think sweet, robust spinach versus watery store varieties, or juicy, flavorful tomatoes. But, she says, it’s important to also consider the time you have to invest. Busy gardeners should opt for low-maintenance crops with longer harvest windows. And, don’t forget the power of rotation. While companion planting can be helpful in large gardens, it’s the organization based on sun requirements, size, and harvest timing that truly maximizes productivity. Christiana keeps things simple, with crop rotation being a priority for disease-prone plants like tomatoes. For a garden that’s both productive and beautiful, rows can be a powerful tool—offering structure, efficient watering, and visual appeal when paired with layered plantings.
Beauty Meets Bounty
Thomas J. Story
For Christiana, design and functionality go hand in hand. “The key is a streamlined layout with wide paths and deep beds,” she says. “Design should reflect the surrounding landscape, using materials like locally sourced wood to ensure the garden feels integrated into its environment.” With a focus on symmetry and contrast, Christiana uses plants’ natural textures and colors to bring visual interest to vegetable gardens. She recommends pairing contrasting plants like purple basil with dark greens and layering plant heights to create depth, such as planting spiky onions next to frilly red lettuce.
Thomas J. Story
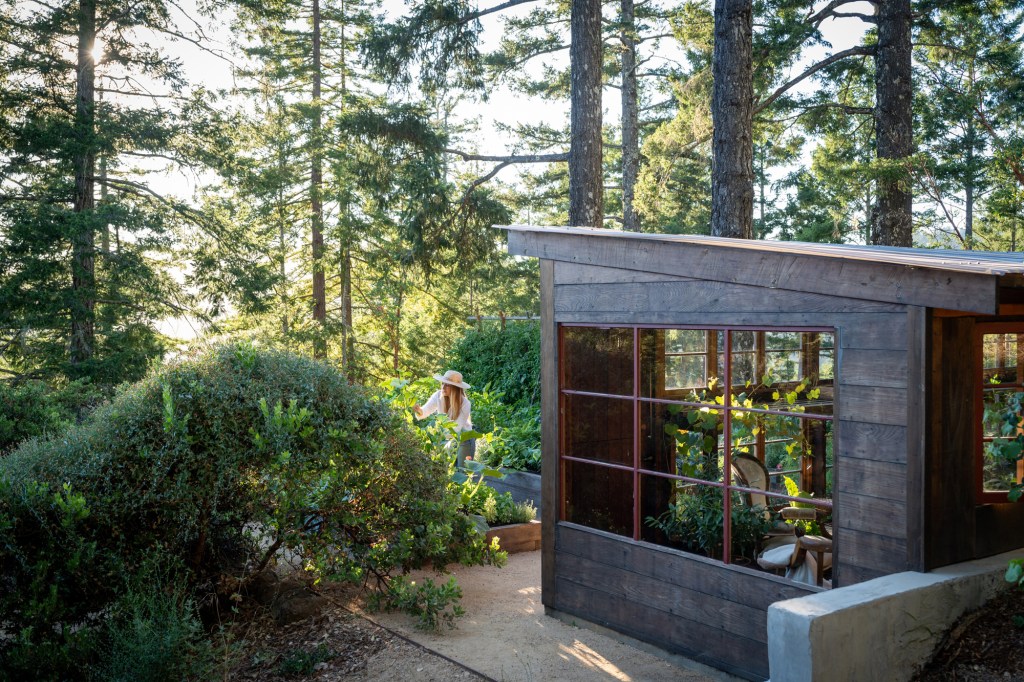
Her design philosophy draws heavily from the natural landscape around her home in Northern California. “A garden should feel like it belongs to its surroundings,” she says. Inspired by the surrounding redwoods, Christiana uses native plants and local materials to create harmony between her cultivated space and the wilderness. Whether it’s using redwood for garden beds or California gold gravel to blend the edges of her garden into the natural soil, her designs prioritize sustainability and beauty that flows with the land’s contours. “It’s all about creating a garden that feels like it has always been there.”
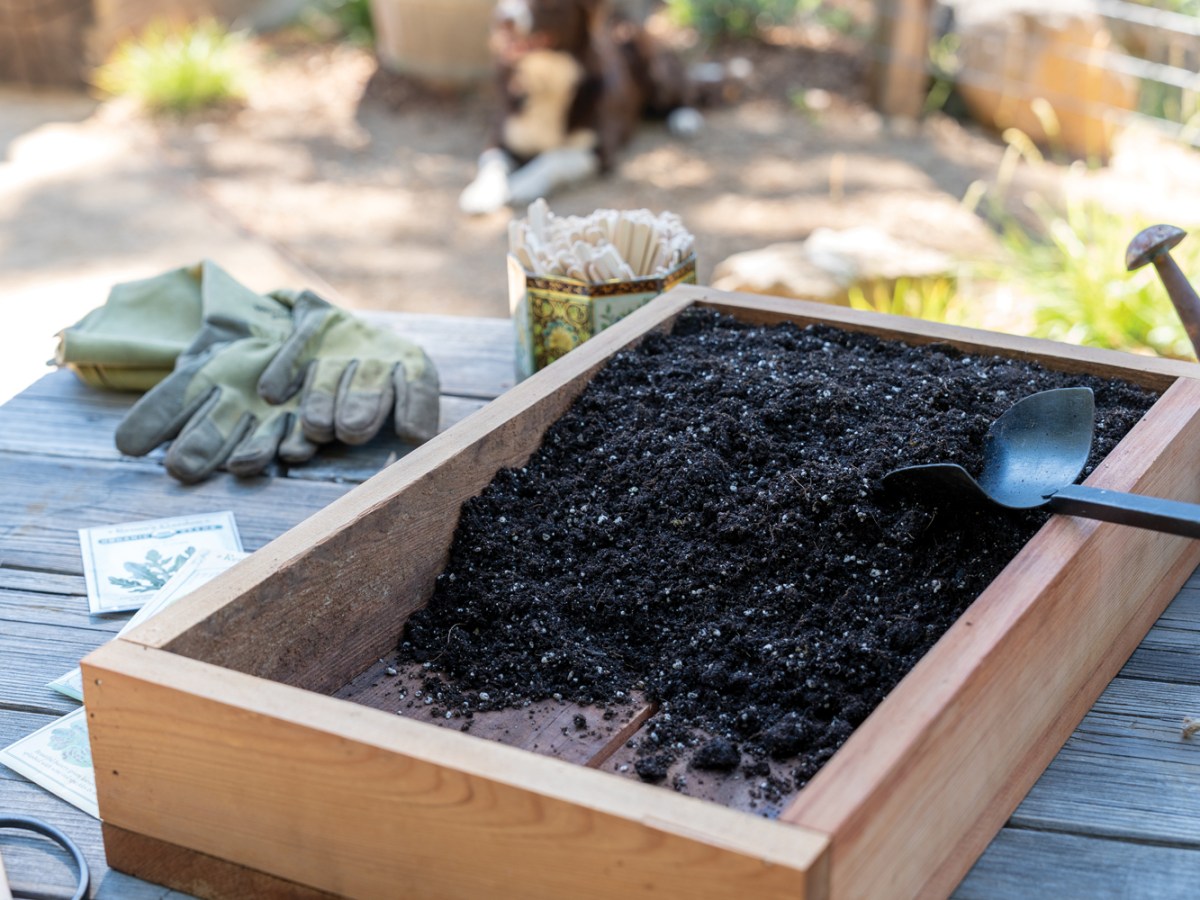
Simple, Sustainable Seed Trays
Thomas J. Story
Christiana advocates for plastic-free gardening, recommending compostable pots, wood trays, terracotta, metal, and even egg cartons. “The real culprit is single-use plastic,” she says. “Seed trays and pots that can be reused for years are not the issue.” For her tools and storage, she opts for metal, wood, and glass, citing their durability and aesthetic appeal.
When it comes to DIY wooden seed trays, she embraces simplicity and sustainability. These easy-to-make trays are a practical, low-impact solution that reduces waste and helps plants thrive. Here’s how to build your own.
Thomas J. Story
MATERIALS
1-in.-thick redwood
2 bottom pieces: 20-in. x 6 ¼-in.
2 short walls: 3-in. x 12 ¾-in.
2 long walls: 3-in. x 18-in.
2-in. 18-gauge finish nails (like those used for baseboards and molding)
How-To
- Assemble the box upside down for a clean finish, with most nails inserted from the bottom.
- Arrange the walls upright on a flat surface: short walls at the top and bottom, long walls set inside (total length 20 inches).
- Attach the first bottom piece on the left-hand side, ensuring it’s flush with both corners. Nail it every 2 to 3 in. around the perimeter.
- Attach the second bottom piece on the right-hand side, leaving a ¼-in. gap between the floorboards for drainage.
- Flip the box over and add 2 to 3 nails at each corner to secure the wall pieces.
Customizing
Sizing: Adjust floorboard length to the width of your box, minus ¼ in. for drainage. For wider boxes, split the floorboards into 3 to 4 pieces for more drainage gaps.
Wall Height: Customize the height to fit your needs—shallower for seedlings or deeper for larger transplants.
Aesthetic Tip: Hide the end grain by positioning the full-length wall at the front of the tray for a smoother finish.
Maintenance
If using non-rot-resistant wood, try burning the inside with a Shou Sugi Ban technique or apply an oil sealant for extra durability. Redwood, however, needs no special treatment beyond occasional cleaning with water.
