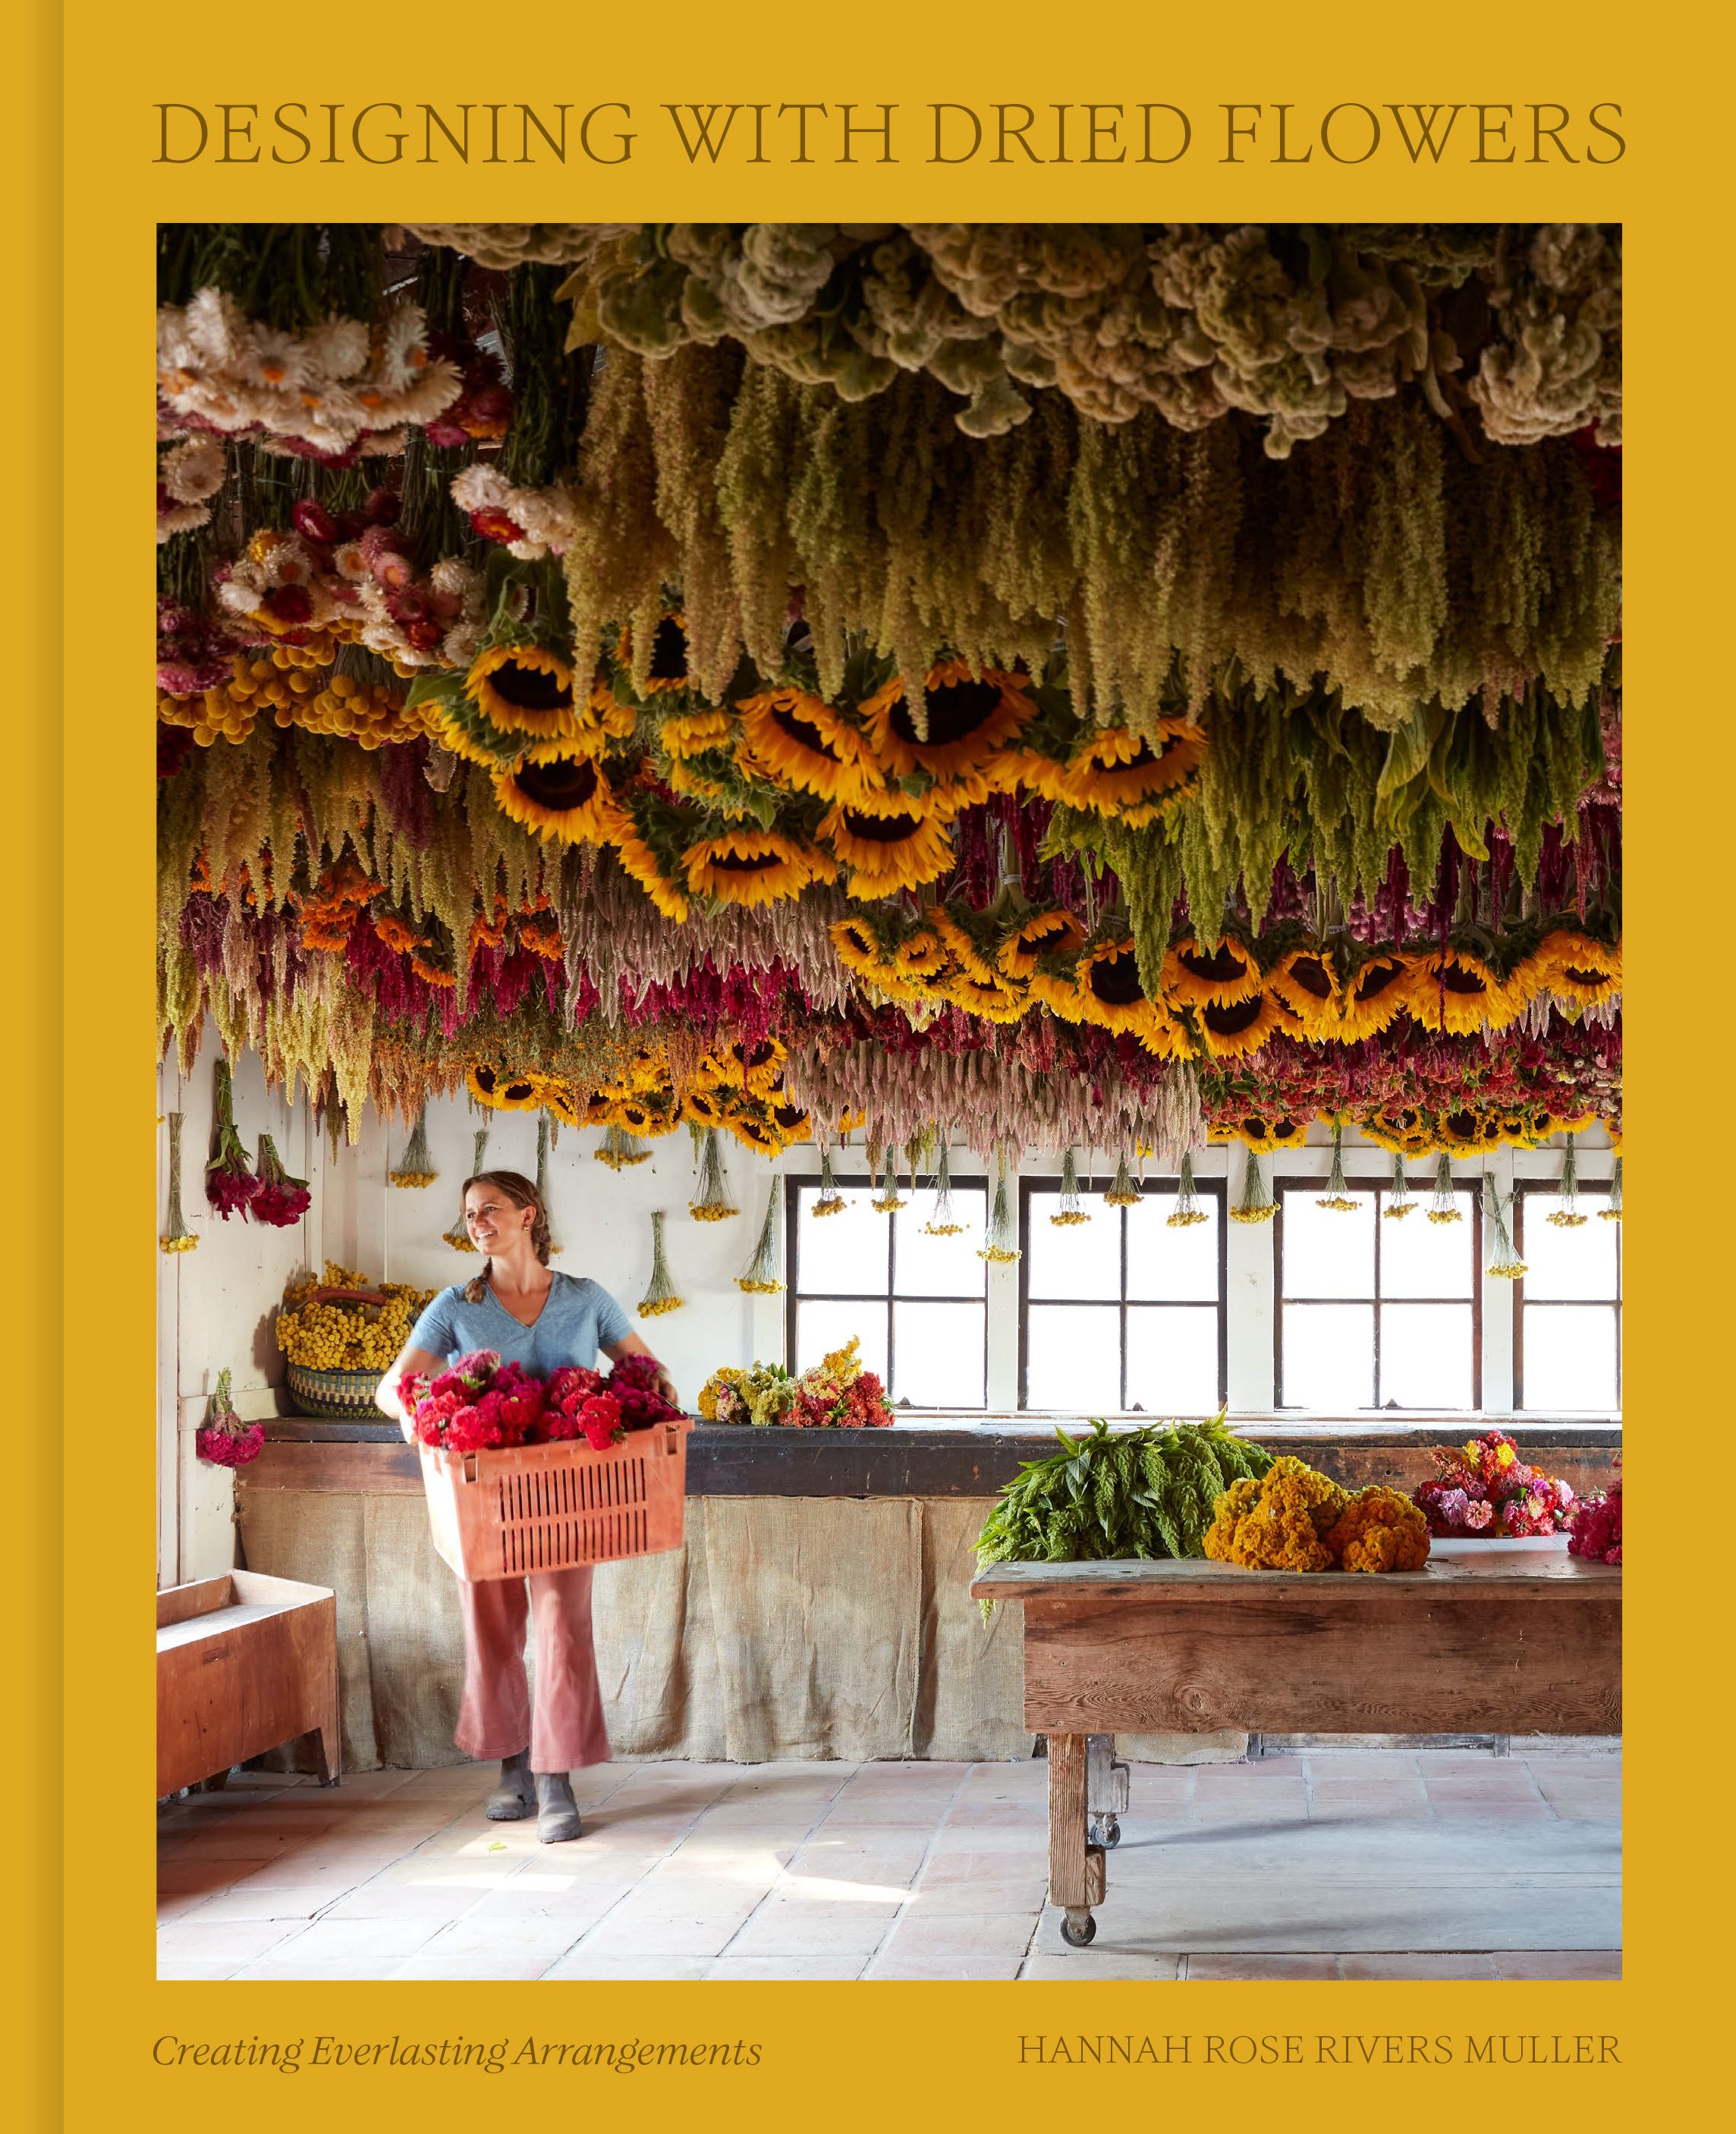
In Hannah Muller’s debut book, Designing With Dried Flowers ($22.31; Penguin Random House), she shares expert advice straight from the fields on how to create beautiful, everlasting works of art for any season and occasion. It’s packed with gorgeous photography, handfuls of tips, flower growing and harvesting suggestions, plus inspiring dried flower crafts that go well beyond vase arrangements.
Here Hannah shares a stunning interpretation of braided garlic, which weaves in late spring and summer blooms such as strawflower, statice, ammobium, and flax that are also ready to pick just in time for your mid-year garlic harvesting. We hope this DIY inspires you to grow and preserve from your garden in new, thoughtful ways.
Make Your Own Garlic Braid
Materials
50 stems of flowers, such as statice, ammobium, nigella, and flax
12 or more garlic heads with about 1-foot-long, semi-green stems
Twine or ribbon
In the spring, the smell of garlic hangs heavy in the air at the farm. The fresh green garlic gets harvested and sorted and is brought into our packing shed to get washed of any mud. Every afternoon, the packing shed smells as if the finest French cuisine is being served. My mouth waters as I arrange mixed bouquets a couple yards away in our floral room. We have learned to appreciate garlic at every stage of its life at Full Belly Farm. Once the green tips of the shoots begin to turn slightly brown, we know that the heads are starting to form underground, getting larger and mature enough to harvest and dry for the summer. But before they dry completely, when the stems are still green, one of our favorite traditions is to make garlic braids with dried flowers. There is a reason this age-old tradition of twisting strands of garlic into art persists.
If you cultivate your own garlic for this arrangement, harvest it when there are three or four green leaves still visible. Clean off any dirt and broken leaves and trim the roots low. If you don’t grow your own garlic, garlic bulbs with the greens still attached are not commonly found in grocery stores, so look for them at a farmers market. You may need to partially dry them for a few days after you get them home so they are the right texture for braiding. To ensure that the flowers are malleable enough for braiding, use ones that have been rehydrated or are not yet fully dry and will dry in place.
There are a few talented individuals at Full Belly Farm who create masterful garlic braids every summer. Their technique and skill make the task look simple, but just like any craft, practice and patience is required. For this project I asked Catalina, one of our talented farmers, to step in to demonstrate how to create these beautiful designs.
How to Make Your Own Floral Garlic Braid
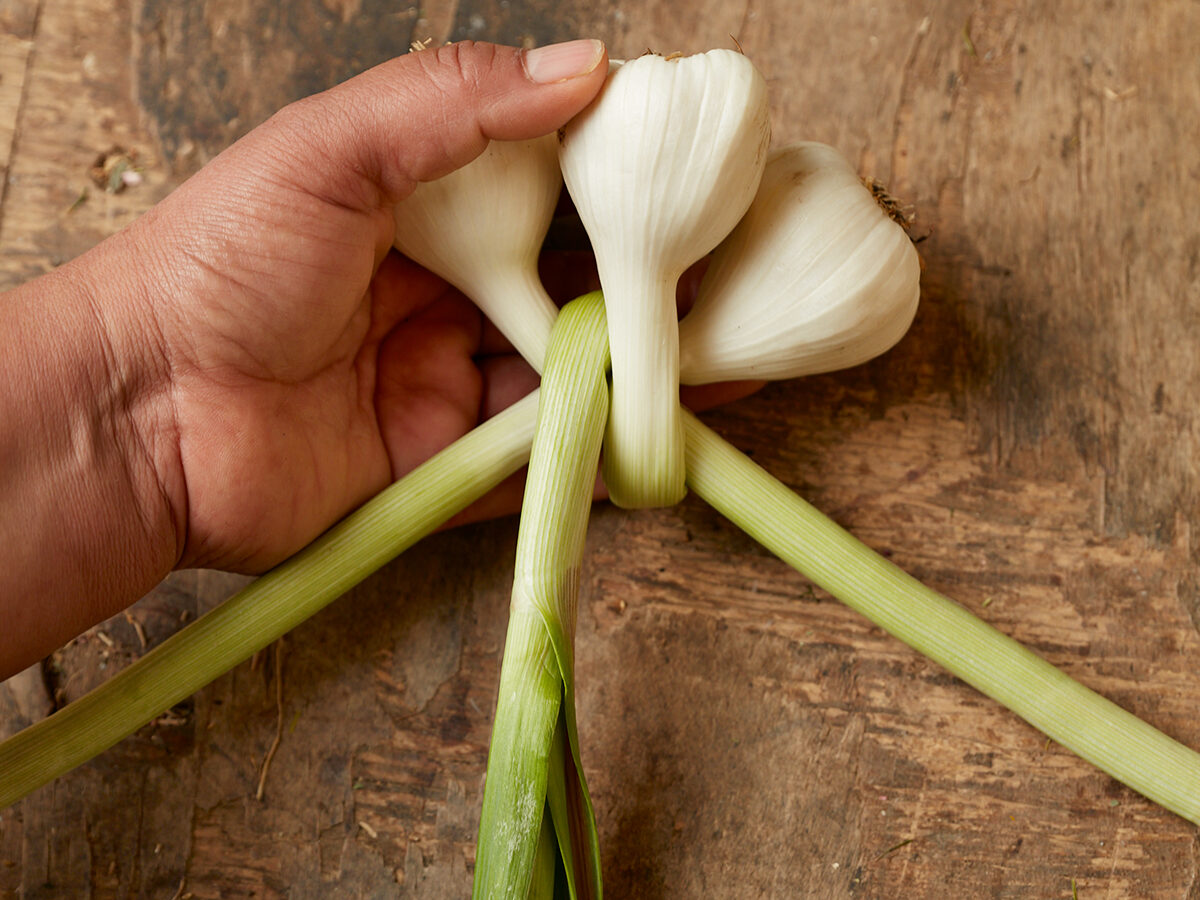
1. Prepare the flowers and garlic by removing any foliage below their heads. Keep flower stems longer than 5 inches and the stems of the garlic as long as possible.
2. Begin the braid by crossing two garlic heads at the neck to form an X. Place a third garlic head on top of the X and tightly loop its stem underneath and over the top of the X so that it comes all the way around to face downwards again and holds the first two crossed heads in place.
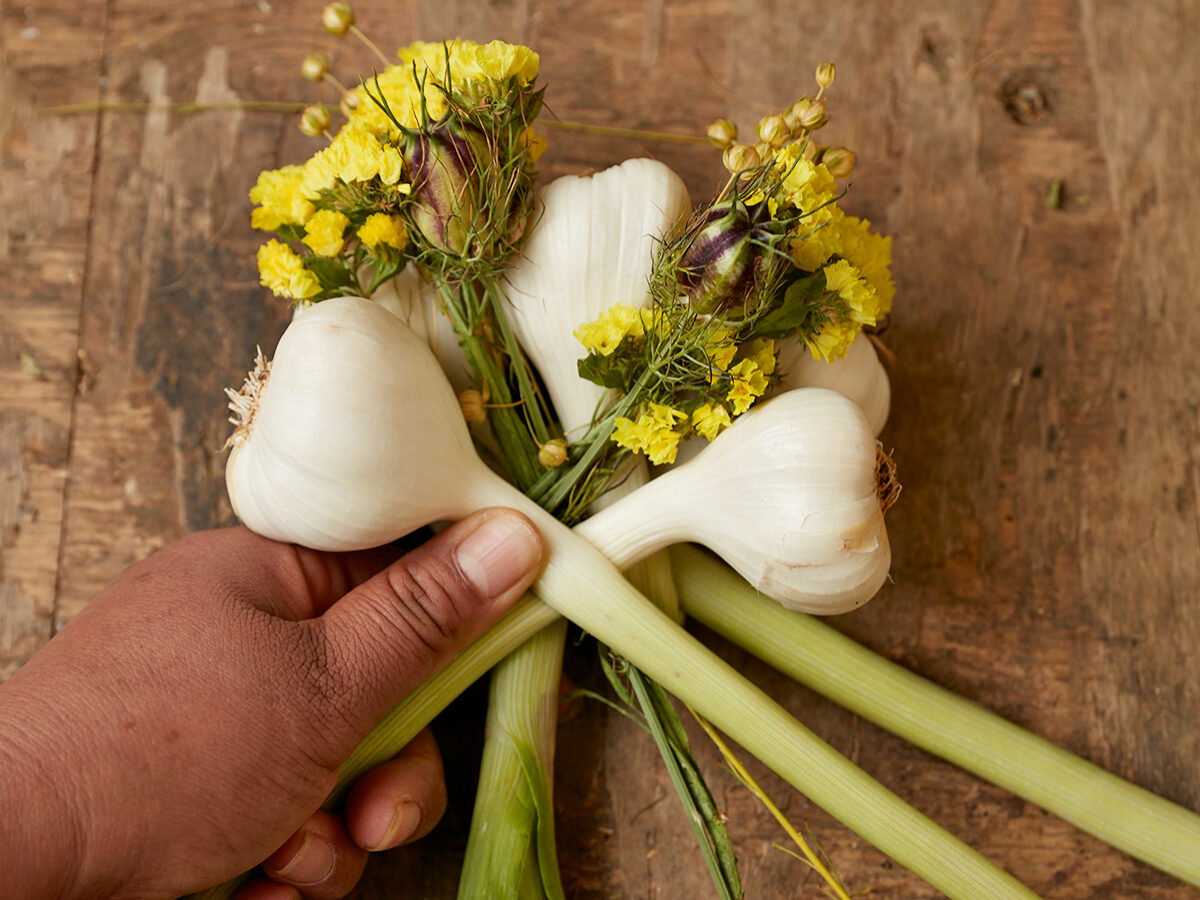
3. Add your first flowers following the same crossed X shape so that the flower stems fall roughly in line with your crossed garlic stems. Put in only one or two flowers at a time and keep their height slightly above the tops of the bulbs. For the remainder of the braiding instructions, add flowers as desired with each new layer of garlic heads.
4. To start creating the descending braid, add two more garlic heads, in another crossed X shape on top of your first flowers, staggering them a half-inch lower than the heads underneath them.
5. Place another head in the center of the braid with its stem pointed straight down. You should now have six heads of garlic with three distinct stem clusters.
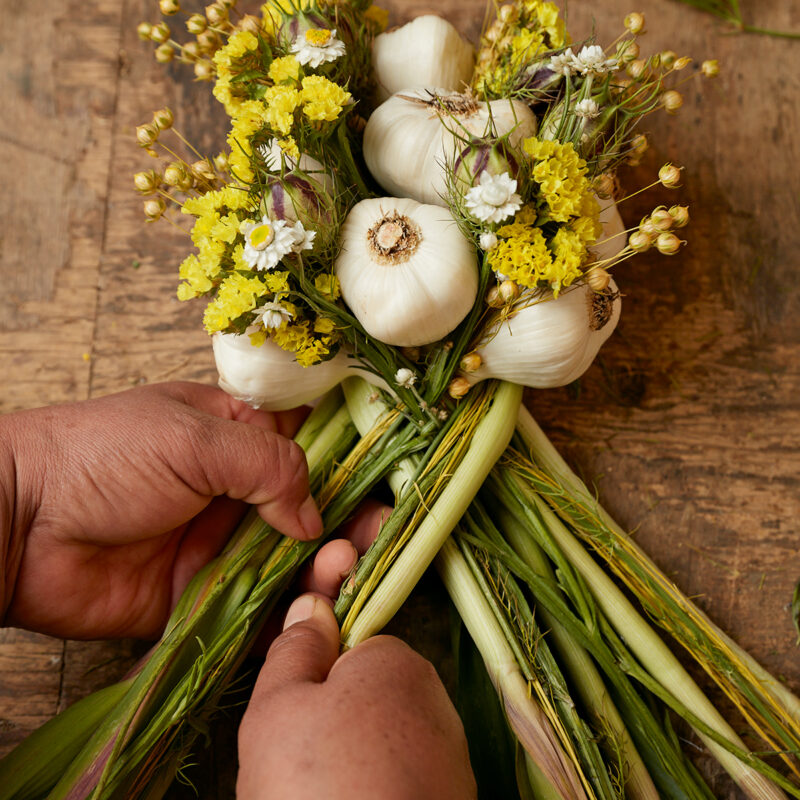
6. Take the right stem from the bottom X and wrap it tightly across the top of your braid so that it now points down and to the left. Now you should have two layers of three garlic heads each and have formed the base of your braid. You’re ready to begin a standard three-strand braid.
7. Add another head with the stem pointed straight down and lay a second head on top, with its stem pointed down and to the left and its head up and to the right. Wrap the bottom-most garlic stem that is pointed down and to the left up and around so that it joins the middle cluster. Add another garlic head to complete another row of three heads.
8. Continue to add garlic and flowers in the same crossing and braiding pattern until you have run out of garlic. The added heads and wrapped stems don’t always follow an exact pattern. Improvise where you direct your new stems as necessary to keep each of your three braiding clusters roughly uniform.
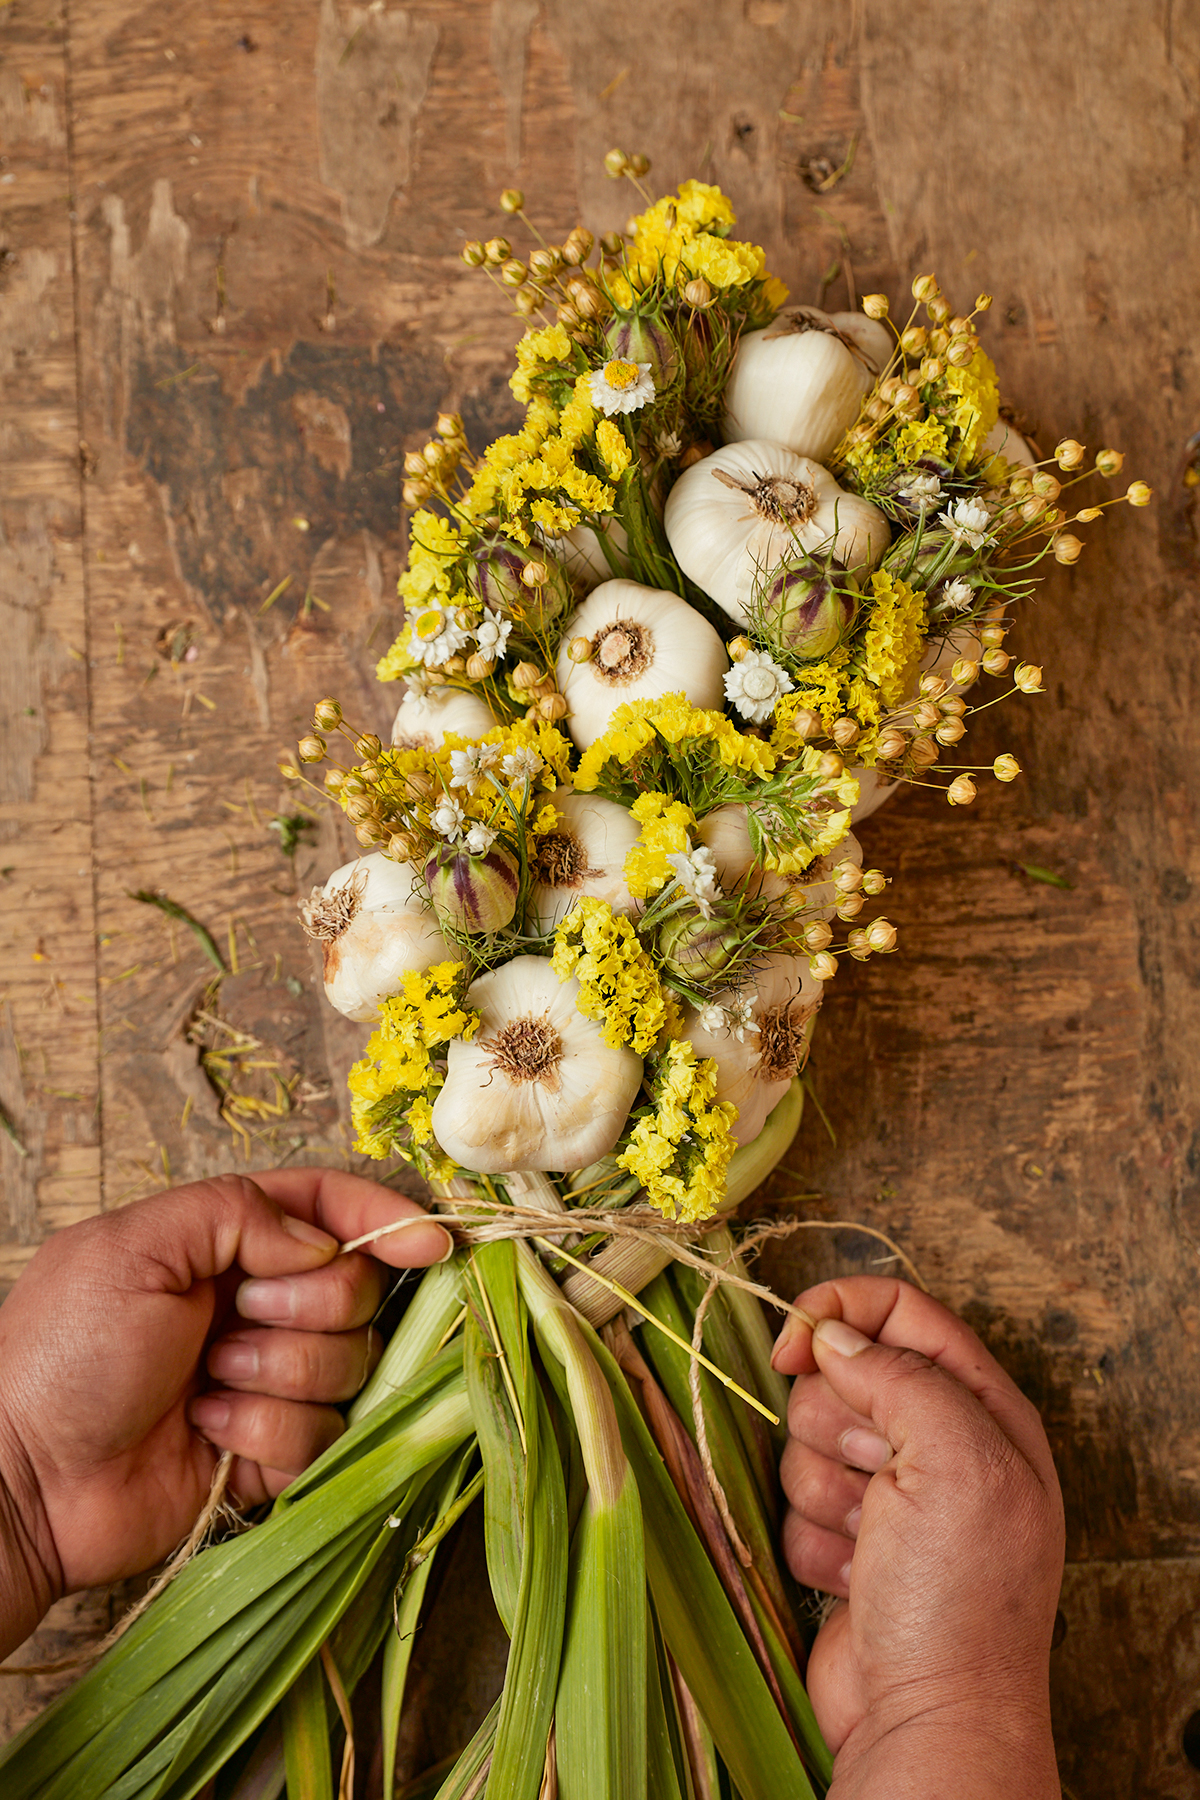
9. With twine, tightly wrap the entire braid beneath your bottom-most garlic heads. Keep an extra yard of twine on each end of your knot. Continue to braid the remainder of your stems, including the extra twine along with them. This will provide extra strength when hanging your braid on a wall as the stems dry and weaken over time.
10. When you have reached the dry ends of your stems, tightly tie up the whole braid again, using the remaining lengths of twine that come out of your braid. Trim off any dry ends of your stems and add more flowers to the lower portion of the braided stem, or, for a wilder look, leave the braid exposed and the stem ends intact.