Lessons from a Family Garden Makeover

Renovating a garden can be a challenge, especially for first-timers. But with a little research and a healthy dose of patience, flexibility, and elbow grease, you can turn bare soil or an overgrown jumble of plants into a landscape you love ― and enjoy the process.
That’s what David and Celestina Finkle found when they re-imagined their makeover project as a family adventure.
With four children reaching their teens and 20s, the couple knew it was time to transform their backyard in San Jose, California, from a kids’ hangout into a dream garden.
With four children reaching their teens and 20s, David and Celestina Finkle knew it was time to transform their backyard in San Jose, California, from a kids’ hangout into a dream garden.
Led by the couple’s older daughter, Sharon, then a high school senior with a passion for gardening and a goal of becoming a landscape architect, the Finkles planned, designed, and created their new garden in just a few months.
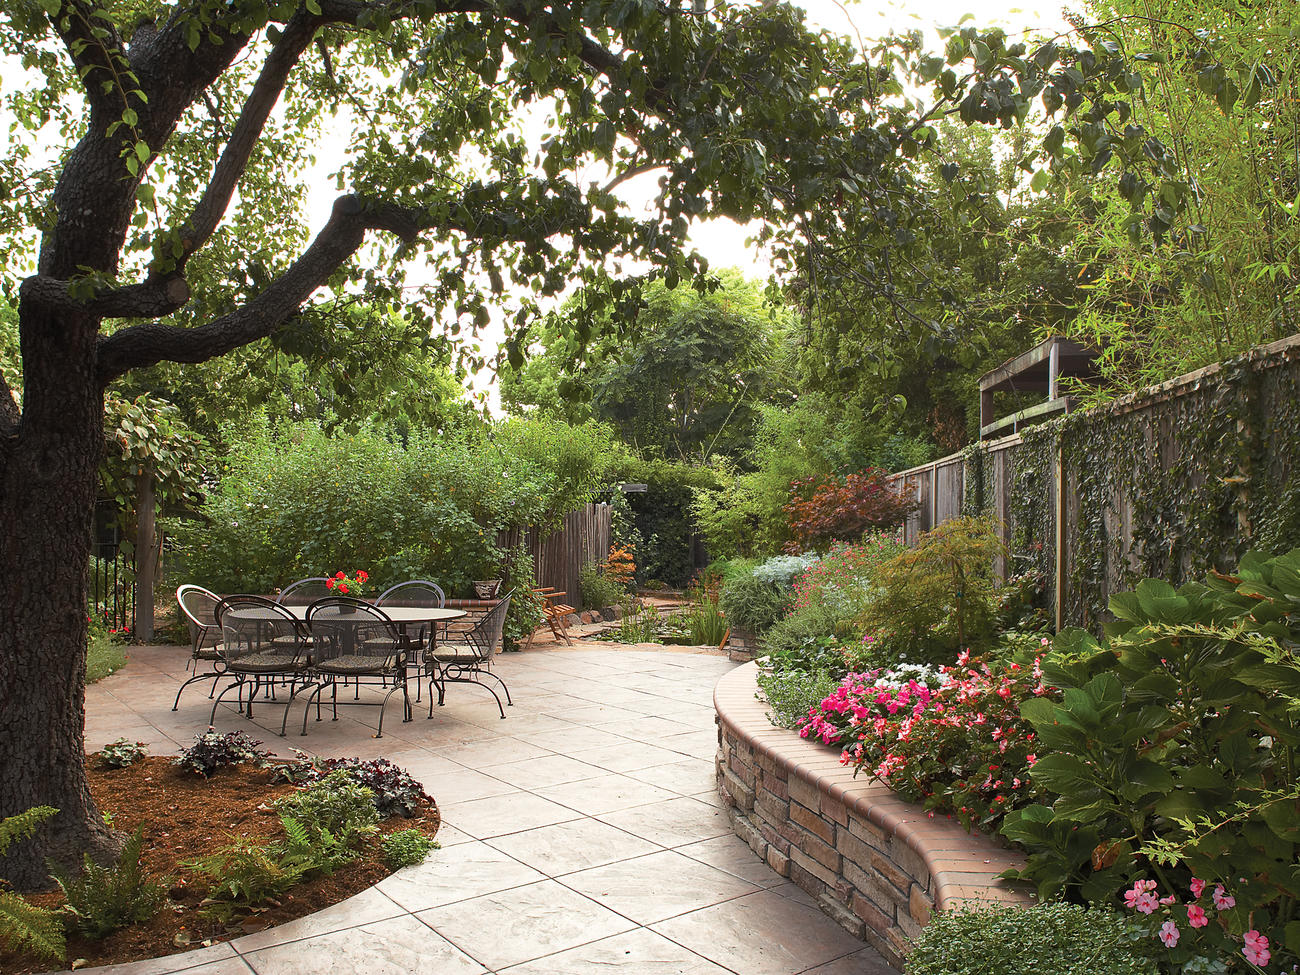
Their biggest priority was to break up the roughly 2,900-square-foot backyard into a series of garden rooms.
They also wanted more appealing views, a pond, a new patio, and drought-tolerant plants.
For help with hardscape, the Finkles consulted landscape architect Teri Ravel Kane (408/266-1662), who provided conceptual drawings for the backyard.
Under Kane’s watchful eye, Sharon combined all the ideas into a master plan. Then she and two of her siblings ― Megan and Blake ― rented a jackhammer and dumpsters and tore out brick paths and the cement patio, with help from grandpa Jim.
Vicente Chavez, a concrete and masonry specialist (408/910-2255), installed the new patio; he made the paving look like slate by stamping texture onto colored concrete.
He also built raised planters. The kids filled the planters with soil from a landscape supply yard; Sharon and Celestina chose plants that fit the Mediterranean look.
Seeing the project through from start to finish confirmed Sharon’s career aspirations. (She served as Sunset’s test garden intern last summer and is currently a landscape architecture student at California Polytechnic State University, San Luis Obispo.) Was the effort worth it? You bet. The garden is an all-occasions gathering spot for the entire family.
Now the garden is an oasis. David Finkle designed the pond and installed it with help from son Blake and Blake’s friends David Silva and Chris Gomez.
Your garden makeover: 10 steps to success
• Make a wish list.
Write down the elements you want and need, from hardscape to plants, paths to patios. Prioritize your wishes while keeping the budget in mind.
• Evaluate the site.
Analyze what’s already there, including trees, shrubs, and paving. Determine what to save and what to remove.
• Find your style.
Create an idea file. Look through books and magazines for inspiration. Save pictures of attractive landscapes, plant combos, or paving you like. Visit nurseries and note appealing plants. “The more knowledge you have, the better you can plan,” says Sharon Finkle.
• Draw a rough plan.
Use grid paper and work to scale (typical for an average-size property is 1/8 or ¼ inch to 1 foot). Mark views that need screening, the direction of prevailing wind, and where the sun falls in summer and winter.
• Call in help if you need it.
Consider hiring a landscape architect or designer for a consultation and a plan. Irrigation systems, lighting, and major hardscaping are often best left to professionals.
• Be resourceful.
If your budget is tight, look for ways to cut costs. Do as much of the work yourself as possible (the Finkles did their own demolition, built the pond, and installed all plants). Recycle materials, such as wood and paving, left over from other projects, or look for them at salvage yards. And buy small plants. Though they take a little longer to fill out, plants in 4-inch and 1-gallon containers are much less expensive than larger ones.
• Save mature trees if possible.
If they’re good-looking and healthy but in the wrong spot, care for them in an out-of-the-way area until you can replant them in a better location. A shapely new tree in a 36-inch box can cost hundreds, even thousands, of dollars.
• Use less expensive materials.
Real stone is nice but pricey. The Finkles liked the look of flagstone for the patio. But because it was costly and needed too much maintenance, they chose colored concrete for the patio and faux stone for the raised planters.
• Add personal touches.
Include elements that make the garden yours. The Finkles placed steppingstones with the children’s hand- and footprints ― and James’s sneaker print ― around the garden.
• Be flexible.
As you move forward with your project, you’ll come across alternatives to your wish-list items that may be an equally good ― or better ― fit for your needs. “Realize that the process takes time and things will keep changing until the very end,” Sharon says.
