How to Make Colorful Dyes from Your Own Garden
You can create some colorful crafts with plant-based dyes; we’ll show you how.
Hannah Ray Taylor
Erin Berkowitz is a Los Angeles–based artist and certified California Naturalist known for her dye hikes in Southern California. A master at botanical dyes, she hosts workshops in which she shares the plants and techniques to produce seasonally inspired color crafts from the natural world around us. For a calendar of events and to sign up for her newsletter, go to berbostudio.com.
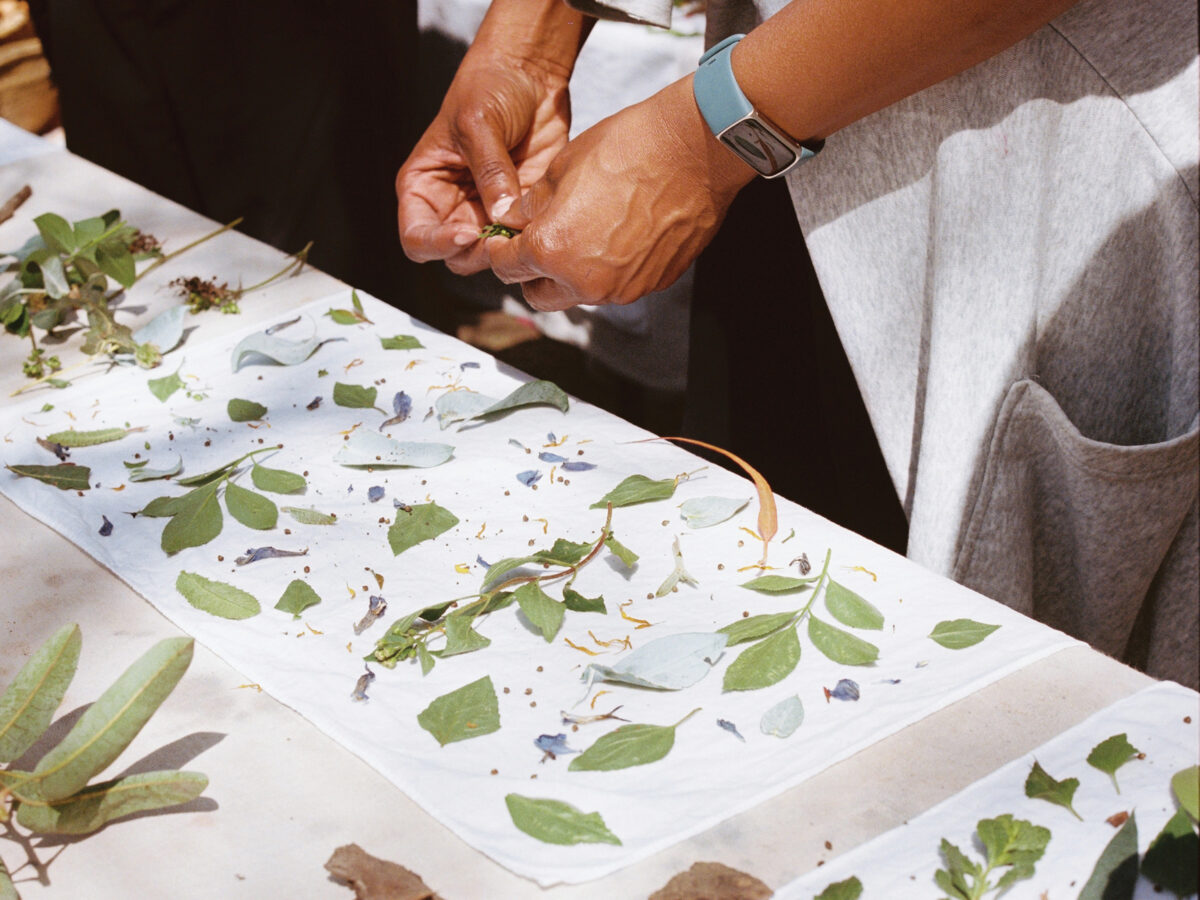
Harvesting How-Tos
When collecting dyeing materials, Berkowitz suggests looking for trees or plants with deeply colored bark, cones, or stems with strong “medicinal” smells. These characteristics can all be signs of latent natural color. If you’re dyeing with native plants gathered from the wild, it’s essential to follow the forager’s rule of thumb: Never take more than 10 percent of any available plant material in the immediate area, leaving the bulk for the wildlife that needs it most. Berkowitz seeks out areas with dozens of examples of the same plant, gathering material from the ground first, noting that some of the best finds are wind-fallen, like pinecones, oak galls, chipped bark, and downed branches.
Pattern Play
Sadie Spezzano
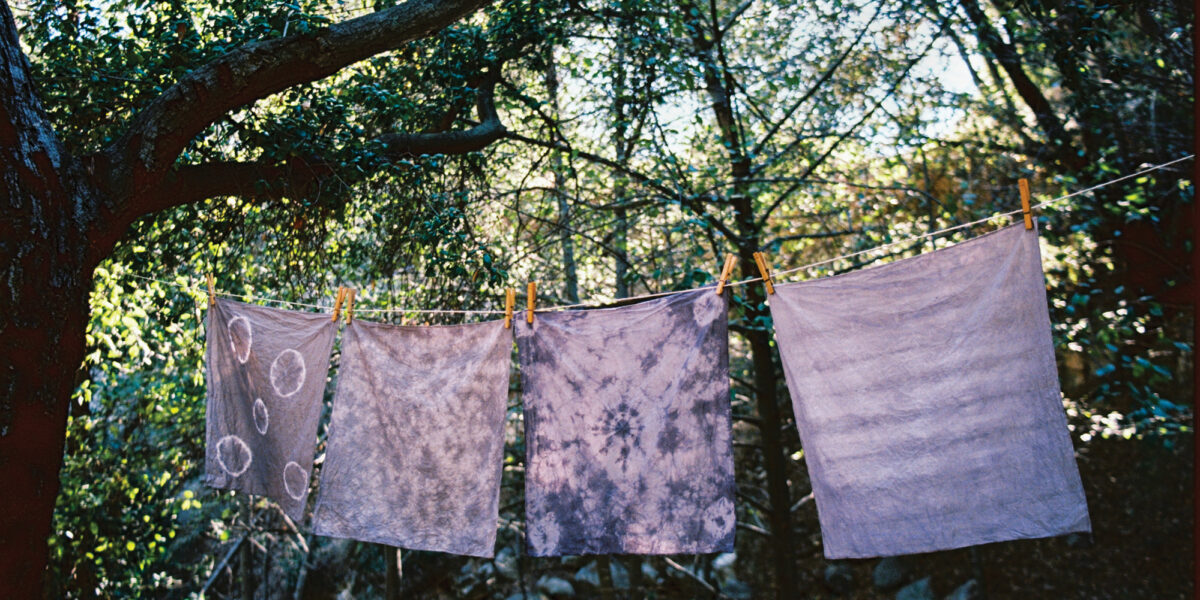
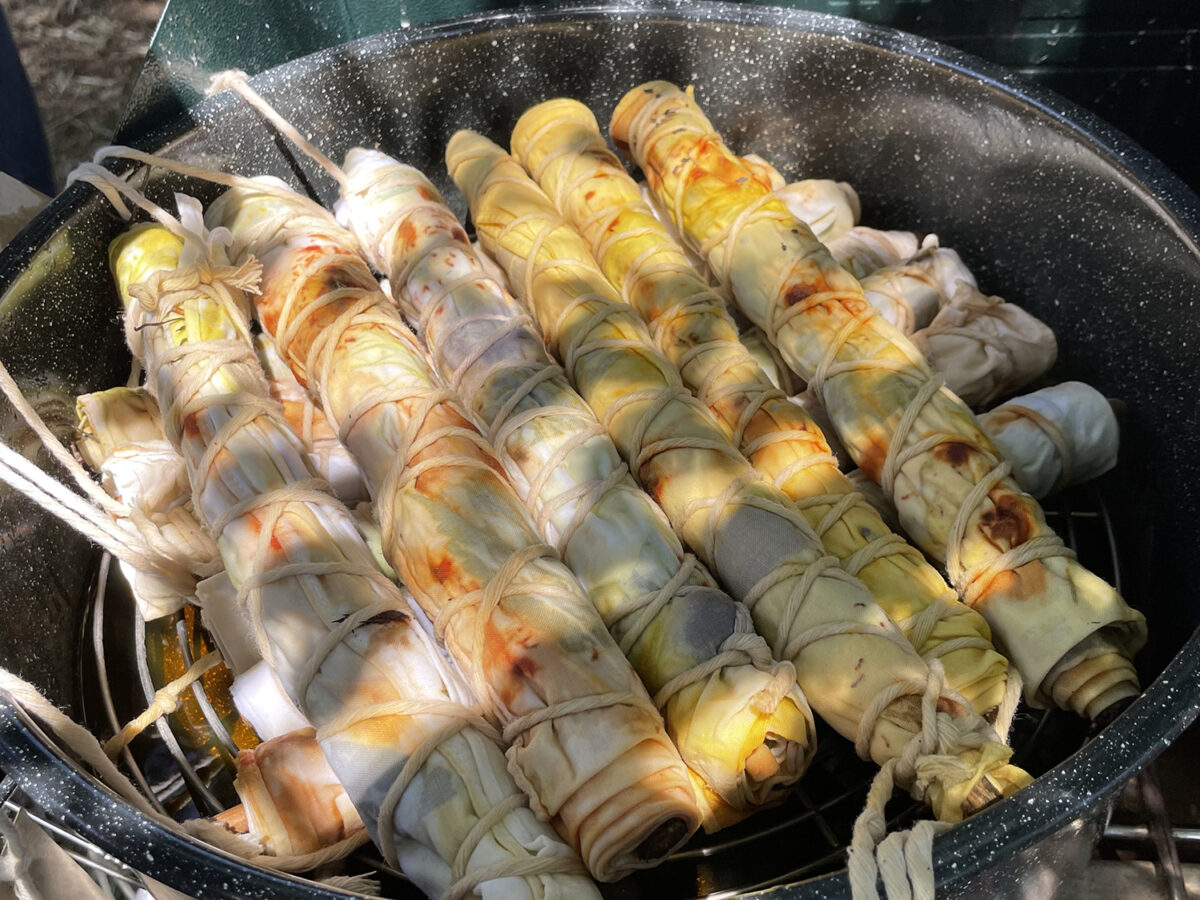
While the natural dye process can create gorgeous texture and color shifts without any additional technique, Berkowitz shares two easy ways to implement patterns into your dying process. To create a marbled pattern using a simple “scrunch” technique, gather edges of fabric into random pleats, folds, and scrunches. Use rubber bands or twine to hold the bundled fabric in place. For checker-like squares, pinch wooden clothespins onto fabric to create a pattern of negative space. Try accordion-folding your fabric, placing evenly spaced clothespins along the folds for a geometric grid pattern.
Project Inspiration
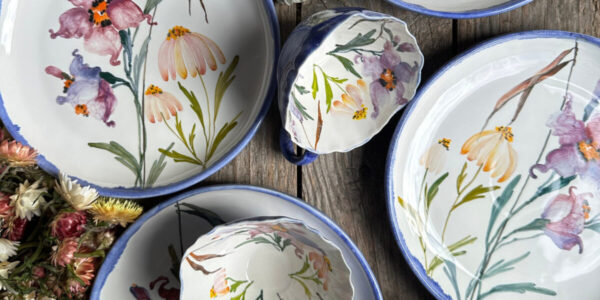
When it comes to winter projects, Berkowitz likes to create a color-coordinated wintry tablescape by mixing earthy plant colors. She also suggests turning fabric scraps into creative, reusable gift wrapping using simple Japanese techniques: Wrap small boxes, books, and even wine bottles with your dyed creations, adding dyed silk ribbons to coordinate, creating custom gift wrapping that is too beautiful not to reuse.
Pick a Plant, Pick a Paint
Erin Berkowitz
Depending on your bioregion, you can discover a wide variety of local plants with dye potential to harvest. You can also look to your own garden or the local farmers’ market for materials to get you started. Here we explore a few winter offerings and their color profiles.
Wild-Growing Plant Dyes
Pine, alder, or redwood cones: Pinkish tan to warm brown.
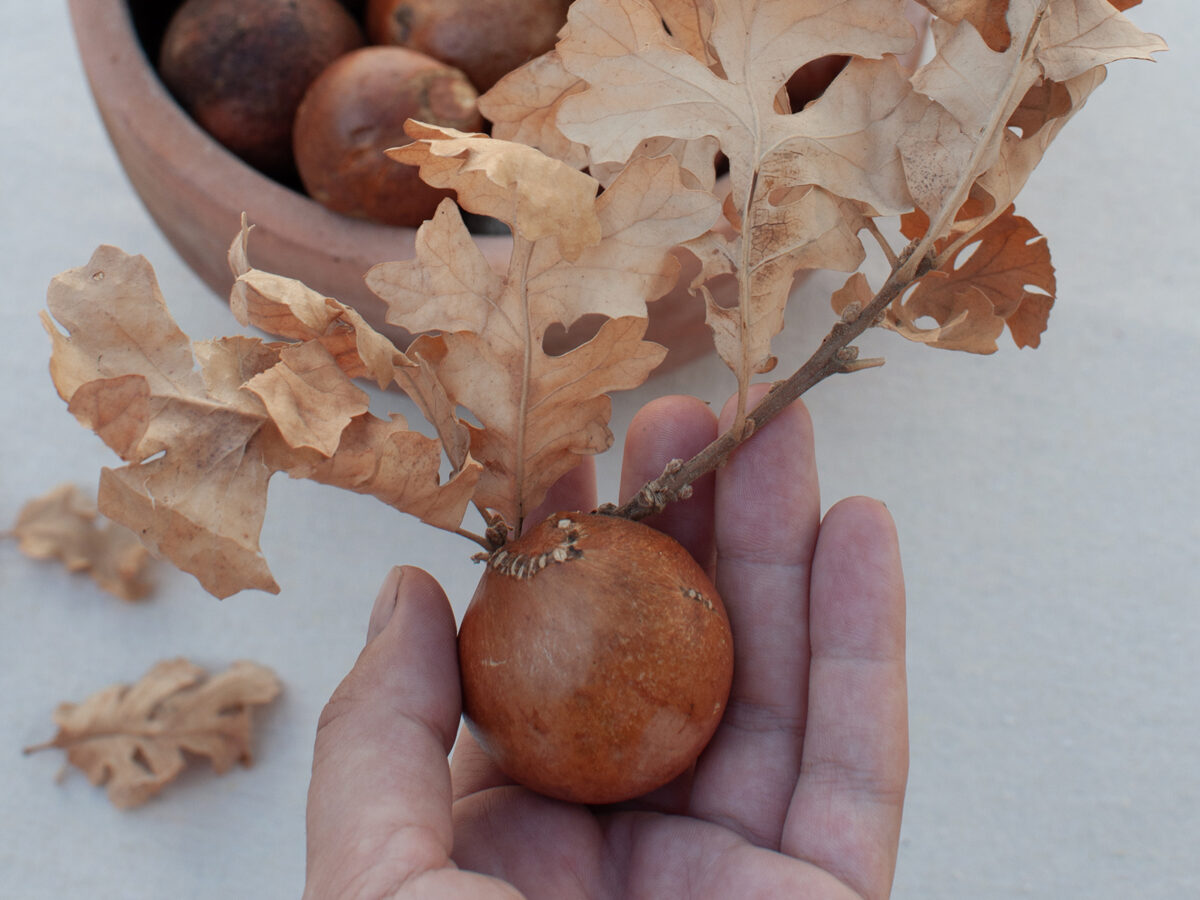
Oak galls: Cool grays and blues.
Black walnut hulls: Tan to chocolate brown.
Toyon leaves and branches: Tan to yellow-orange.
Sagebrush: Golden yellow to olive green.
Garden Plant Dyes
Fennel: Golden yellow.
Rosemary: Mustard yellow to olive green.
Carrot greens: Sunny yellow.
Winter Produce Dyes
Pomegranate skins: Yellow to green-gray.
Avocado pits and skins: Peach-pink.
Onion skins: Yellow-orange to brown.
Master Dye Recipe

Erin Berkowitz
New to the world of botanical dyes? Berkowitz shares her “master dye recipe” to get you producing natural colors with ease.
Tools
Cookware and utensils reserved only for dyeing (stainless steel or enamel are good choices), stirring spoons, a strainer, kitchen thermometer, food-grade bucket, and cheesecloth or mesh drawstring bags.
Fabrics
Natural fibers like cotton, linen, hemp, silk, or wool respond best to natural dyeing. Silk and wool have a special affinity for natural dyes, and results will often be more vibrant or vivid on animal fibers.
Safety Tips
Wear gloves (especially when mordanting) and work outside or in a well-ventilated space for any dyeing project. Make sure all pots, utensils, and other supplies are reserved for dyeing only and never used for cooking or serving food.
Ongoing Care
Wash dyed fabrics separately or with like colors using a gentle, pH-neutral detergent. Less sun exposure means less color fading. Natural dye colors can last for years with proper care.
Preparing Fabric: Mordanting
Absolutely essential to the natural dye process is a simple step called mordanting, a process that allows dye to permanently attach to fiber.
Measure alum powder at approximately 10 percent of the weight of your fabric to be dyed; dissolve in very hot tap water in a bucket or non-reactive pot.
Soak your fabric in the alum solution for 1 hour, stirring often to ensure even uptake of the mordant.
Rinse and proceed to the dye process.
The Dyeing Process
Erin Berkowitz
To “brew” your dye materials, chop or crush your dyestuff into small pieces and tie in a cheesecloth bundle. Submerge in hot water and heat at an active simmer for at least 1 hour to extract the dye. As for how much water to use, Berkowitz’s general rule of thumb is to use just enough water to cover the plant material for the most vibrant results.
Submerge your mordanted fabric in hot (180ºF) dye, stirring often for even color. There is no rule for how long to leave it in the dye pot: 5 minutes, overnight, or anywhere in between. Fabric will dry a shade or two lighter than when wet, so remove your dyed goods accordingly.
Once out of the dye pot, let your fabric cool to room temperature, rinse in tap water, and wash in cold water with gentle liquid laundry detergent. Allow dyed fabric to air-dry in the shade.